|
Colour Theory includes several definitions and applications. There would be enough content to fill several books on colour theory if I really wanted to. However there are 3 parts which we need to look at:
What is the colour wheel? Originally created by legendary science nerd Sir Isaac Newton, scientists and artists have studied the concept and created their own.  The idea of the colour wheel is to separate primary colours, secondary colours and tertiary colours.
Primary colours are red, yellow and blue. From these colours you can make any colour from orange to purple. These three colours are separated at equal portions on the wheel, and the colours are inbetween are the gradients of the colours you get when you mix the two neighbouring colours. Colour Harmony Harmony can be defined as a pleasing mixture of components wether it's music, sport or colour. Harmony for visual experiences is defined as something which is pleasing to the eye. When something does not fit into harmony it can look into boring or chaotic. Harmony delivers visual interest and order. Extreme unity (the same colours) leads to boredom, complexity (a autistic mish mash of colours) leads to over stimulation. Harmony in colours is based on 3 things:
Context of colour use How colours look and behave together is an important part of colour theory. For example a red on a black background is going to stand out a lot more than on an orange background. If you use yellow text on a white background that will look very bad and everything will be wrong and your colours may die. Blues and greens work together well but you may not want to use those colours for text. Purples and pinks are wonderful, but would look very poor for a funeral parlour decor. You have to pick the right colours for the right occasion.
0 Comments
 There has been a lot of press recently concerning the Norovirus. The virus seems to be more prevalent, particularly in convalescent homes. On Jan 19th, 2007, the Dulles Airport Hilton hotel was temporarily closed after 15 employees and more than 100 guests were sickened due to the virus. The Norovirus is highly contagious, requiring as little as 100 virus particles to cause an infection. The Norovirus can be transmitted through exposure to bodily fluids, person-to-person, or directly through fecal contamination of food and water. It can also spread through contact with infected surfaces. The Norovirus can cause acute vomiting, diarrhea with severe cramping, and nausea. It often causes fatigue, headache, and a low-grade fever. The average incubation period is 12-48 hours. The virus itself is not considered lethal. In healthy adults, the virus is comparable to having the flu. However, for young children, the elderly, and those with weakened immune systems, the virus can cause side effects such as dehydration that can lead to a more serious illness, and possibly contribute to the death of the patient.
Are Emergency Medical Service (EMS) providers unknowingly contributing to the spread of the Norovirus? I think they are. Many people don't realize that in addition to responding to medical emergencies, ambulance companies also provide transportation services, taking patients back and forth between medical facilities. In fact, a large portion of their business is the transportation of elderly patients to and from convalescent homes and skilled nursing facilities. Here's why I think EMS may be a contributing factor. As a California licensed Emergency Medical Technician (EMT) and a Certified Nursing Assistant (CNA), I have worked in both environments. When I worked for a local hospital as a CNA, we were required to practice what is called "Contact Precautions", meaning we had to wear a disposable gown and gloves any time we entered the room of a patient who was diagnosed or suspected to be infected with a contagious disease. We also washed our hands before and after every single patient contact. Basic equipment such as thermometers, stethoscopes, and blood pressure cuffs all had to be disposable or thoroughly disinfected. Food trays, drinking cups, and linen had to be handled separately from the rest. But when I worked as an EMT, I noticed something very disturbing. Even though a patient's room was clearly marked for "Contact Precautions", the way that we handled the patient was entirely different from the way I was accustomed to. We never used disposable gowns. We wore gloves, but they were put on before contacting the patient and not taken off until after the patient was transported. We would take our gurney directly into the patient's potentially contaminated room. When large or non-ambulatory patients need to be transferred from their bed to the gurney, it is common practice to use the bottom bed sheet to lift and move the patient. The patient is then placed onto the gurney, along with the sheet. We frequently transported patients to and from convalescent homes and skilled nursing facilities, even when the facility was under a "no visitors" quarantine for Norovirus. At the completion of every run, the gurney is stripped of the disposable linens, and a fresh set is put on the gurney. Of course, if the gurney was obviously contaminated with blood, vomit, urine, or feces, the entire gurney was wiped down with disinfectants. We always tried to keep everything sanitary, but the nature of EMS doesn't always allow enough time to do a thorough job. On busy days, when the EMS system is overloaded, it was not uncommon for things like stethoscopes and blood pressure cuffs to get put back into service without being cleaned. The gurney itself is often put immediately back into service without being properly disinfected. The work done by EMT's and Paramedics is vital to our healthcare systems, and the people who work in that industry are frequently over-worked and under-appreciated (which is why I changed careers.) But there is definitely something wrong with the way our healthcare transportation system deals with infectious disease and nobody seems to be looking at the role EMS practices and procedures play in spreading this and other contagious viruses.  The Medical-Surgical Nursing Certification Board (MSNCB) provides a certification process for certain registered nurses with medical-surgical experience. Candidates must also pass a medical-surgical nursing certification exam. The Board is affiliated with the Academy of Medical-Surgical Nurses and performs the certification testing and approval.
MSNCB requires experience in a medical-surgical setting and a current registered nurse license (RN) in the United States. Foreign applicants may also qualify if they are currently a first-level nurse in the same country where they received their education and have RN equivalency through the Commission on Graduates of Foreign Nursing Schools. There are two kinds of experience requirements in a medical-surgical setting. The first is 2 years of experience. It does not necessarily have to be full-time experience. The second is that the total experience must be at least 2000 hours within the past 3 years. Thus, it is possible to have part-time work in a medical-surgical setting as an RN and still qualify. But the 2000 hours must be within the past 3 years, so those who qualify are generally working on a full-time basis in this field. ANCC is another organization that grants certification for medical-surgical nursing. If you are already certified through ANCC, you might not have to take the MSNCB certification exam. Read the "Exam Exemption" page on the Board's website for details if this situation applies to you. To apply and get ready for the medical-surgical nursing certification exam, download the application and exam guide. There is a link in the Resources below. The normal fee is $375 to apply and take the test and $300 if you fail and need to take it again. It is about $250 for Academy of Medical-Surgical Nurses members and $180 if such members need to retest. The guide has the exam content outline, which is helpful when used together with the exam references to know what to study for this medical-surgical nursing test. The references are also found in the guide. Alternatively, the Academy of Medical-Surgical Nurses has a study and review course for medical-surgical nursing. This may help you prepare, as well. But do not expect to pass the certification exam unless you do some serious self-study with the applicable reference textbooks. You can find out more about AMSN's review courses and workshops from the link below. Resources: MSNCB: Exam Exemption MSNCB: Medical-Surgical Nurse Certification Application and Exam Guide AMSN: Certification Review Courses and Study Guides 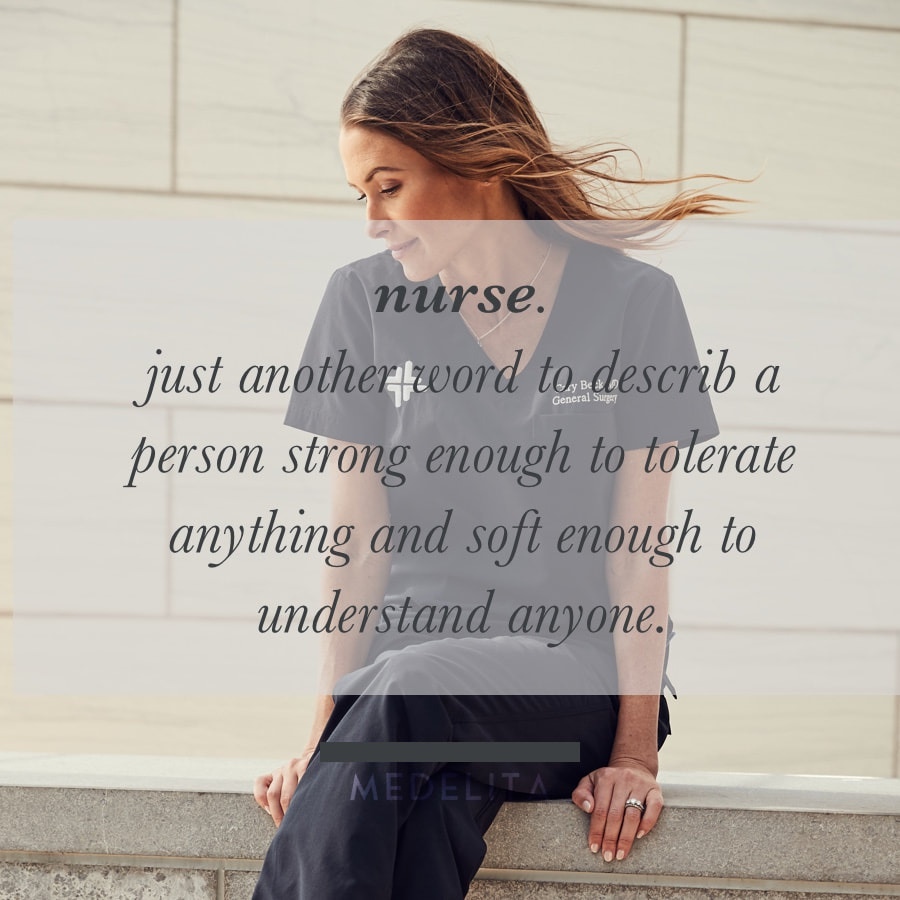 Nurse: just another word to describe a person strong enough to tolerate anything and soft enough to understand anyone.
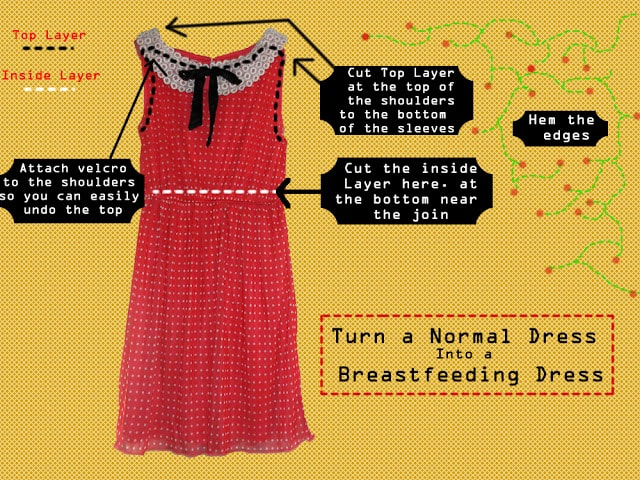 Generally, finding a nice-looking dress to wear while discreetly breastfeeding your baby involves spending a lot of money. However, if you have a sewing machine and basic sewing skills, you can make your own nursing dresses for much, much less. You should probably find a few thrift-store gems to practice on first, before you take needle and scissors to your favorite "going out" dress, though. The best kind of dress for this endeavor is something with a double-layered top, such as a faux-vest (which covers the front bodice and ties in the back) dress, or a faux skirt suit, which looks like a skirt and top but has a second layer underneath the top to which the skirt is also attached. You can also apply this technique to tops like mock sweater sets. Ultimately, you just need something with an under layer which you can cut openings into, and an over layer which will hide those openings but allow access when you need to feed your baby.
The size of the dress you are converting should be slightly bigger than your regular size, because if the bodice is snug fitting, the nursing openings will gap and pull, and may cause embarrassing modesty issues if you aren't careful. Also, if the bodice isn't hanging loosely, and the material is a thin fabric, those nursing openings may show through the over layer. So try on the dress before you start the project, taking into account that your chest may be quite a bit larger than normal when you are nursing a baby. Once again, be sure to practice on a thrift store dress before moving on to finer clothing. To begin, while wearing the dress, mark two straight lines (perpendicular to the waistline) at the places you want the nursing openings to be. You will want to make the openings large enough that you can maneuver the baby to your breast and not have a lot of fabric getting in the way-a two or three inch opening will not be enough. Make sure, before you start sewing and cutting, that the over layer completely covers these markings, with room to spare. This is particularly important for vest-dresses, whose over layer provides a limited amount of coverage. Once your lines have been marked, the next step is sewing. It is very important that you sew around the edges of the opening before you cut the opening, or you will end up with stretched and malformed fabric, and your openings will not be neat. If possible, use the buttonhole-stitch function on your sewing machine. If you do not have that, a very small zigzag stitch will do. Experiment on scrap fabric first to make sure your stitches will be small, neat, and very close together. Starting at the top of your marking, and using the straight line as your guide, sew a buttonhole or zigzag stitch from top to bottom. Sew a few wide stitches at the bottom, and then sew back up on the other side of the marking. Your two straight lines of stitching should be very close together, but be sure to leave a small space in between the two lines so that you can actually get the nursing opening open! Back at the top of your opening, make a few wide stitches again, and then cut your threads. Repeat on the other side, again using the straight line that you marked as your guide. Because you are dealing with several layers, make sure that you are only sewing on the one layer that you will be cutting, because unpicking buttonhole stitches is very, very time-consuming and frustrating. When you have finished the stitching, and removed the dress from the machine, cut all loose threads, and get out your sharpest scissors. Very carefully, cut in between the two lines of stitching to create the opening. Make sure that there are no gaps in the stitching, and that you do not accidentally cut any stitches, or you will find stitches and fabric unraveling after the first wash. If you choose to convert a dress with more delicate fabric, you will need to be very careful with your sewing and cutting, because those types of fabric will stretch and unravel much more easily than denim or even light cotton. Congratulations, you have just created your very own, very inexpensive nursing dress! |

About Jonnah
Started this blog after following thenerdynurse. Trying to share information with the readers. Follow Jonnah
Too often we underestimate the power of a touch, a smile, a kind word, a listening ear, an honest compliment, or the smallest act of caring; all of which have the potential to turn a life around. -Leo Buscaglia |
Photos used under Creative Commons from compassionconnect, compassionconnect
